Download twrp 3.3.1 Root Xiaomi Mi CC9:
unofficial build of twrp 3.3.1 have Now been available for the Xiaomi Mi CC9 user Who own Xiaomi Mi CC9 Smartphone can Root it using the Below Instructions. to Install twrp Recovery on Xiaomi Mi CC9 First You need to unlock it’s bootloader after that You Can Root it by Flashing Magisk 19.2.zip.
Xiaomi Mi CC9 Run on QCOM SD710 SoC along With Android 9.0 6GB of RAM and 64/128GB of Internal Memory. it Come with 6.3 Inch AMOLED Display With the Resolution of 1080 X 2340 Pixels.
for root/ twrp Installation For Latest updates Please use Following Page
Disclaimer:
- Rooting May Void Your Device Warranty
- Make a backup & Move it to Safe Place Like Pen Drive or PC.
- Make Sure Your Phone at-least 50% Charge to Prevent accidental Shut Down during the Rooting Process.
Download Files:
How to unlock bootloader on Xiaomi Mi CC9:
- From Here
How to Install twrp Recovery on Xiaomi Mi CC9:
- Download & Setup adb Fastboot tools/Platform tools
- Now Download and Extract recovery.img [Must rename recovery.img] file In the Platform tools Folder.
- Switch off Phone and together Press Volume Down and Power button it Will boot it in fastboot Mod.
- Connect Phone to PC using the usb cable.
- open CMD in the Platform tools Folder and type below Code.
Check Device by Sending below Command:
fastboot devices
flash Recovery by Sending below Command:
fastboot flash recovery recovery.img
fastboot boot recovery.img
How to Root Xiaomi Mi CC9:
- Download Magisk 21.4.zip From above and Move it to Device Storage.
- Now Switch off Phone and together Press Volume Up and Power button it Will boot your Phone in twrp.
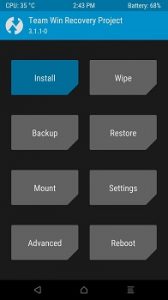
- In the twrp Click on backup Button Select Require Partition and Swipe Slider to Create a nandroid backup.
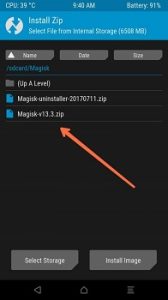
- Click on Install Button and Locate Downloaded Magisk 21.4.zip and Then Swipe Slider to Install it.


- again Click on Install and then Locate No verity opt encrypt.zip and Swipe Slider to Install it.
- Done/ then Reboot System Now.


