Download twrp 3.3.1 Root Zenfone 6/ 6Z:
unofficial build of twrp 3.3.1 have Now been available for the Zenfone 6/ 6Z user Who own Zenfone 6/ 6Z Smartphone can Root it using the Below Instructions. to Install twrp Recovery on Zenfone 6/ 6Z First You need to unlock it’s bootloader after that You Can Root it by Flashing Magisk 19.2.zip.
Zenfone 6/ 6Z Run on QCOM SD855 SoC along With Android 9.0 6/8GB of RAM and 64/128GB of Internal Memory. it Come with 6.4 Inch IPS Display With the Resolution of 1080 X 2340 Pixels.
for root/ twrp Installation For Latest updates Please use Following Page
Disclaimer:
- Rooting May Void Your Device Warranty
- Make a backup & Move it to Safe Place Like Pen Drive or PC.
- Make Sure your Phone at-least 50% Charge to Prevent accidental Shut Down During The Rooting process.
Download Files:
- Magisk 19.3
- No verity opt Encrypt
- twrp 3.3.1 Zenfone 6/ 6Z
- Platform tools/adb Fastboot tools
- unlock bootloader with official app
How to Install twrp Recovery on Zenfone 6/ 6Z:
- Download & Setup adb Fastboot tools/Platform tools
- Now Download and Extract recovery.img [Must rename recovery.img] file In the adb tools Folder.(also Move Installer.zip to Phone Storage)
- Switch off Phone and together Press Volume Down and Power button it Will boot it in fastboot Mod.
- Then Connect Phone to PC using the usb cable.
- Now open CMD in the adb tools Folder and type below Code.
Check Device by Sending below Command:
fastboot devices
Reboot to twrp:
fastboot boot recovery.img
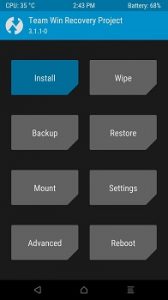
- Click backup and Make a backup. Now Click Install and flash Installer.zip then No verity opt encrypt.zip. Done
How to Root Zenfone 6/ 6Z:
- Download Magisk 19.3.zip From above and Move it to Device Storage.
- Now Switch off Phone and together Press Volume Up and Power button it Will boot your Phone in twrp.
- In the twrp Click on backup Button Select Require Partition and Swipe Slider to Create a nandroid backup.
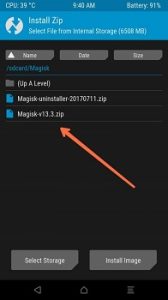
- Click on Install Button and Locate Downloaded Magisk 19.3.zip and Then Swipe Slider to Install it.


- again Click on Install and then Locate No verity opt encrypt.zip and Swipe Slider to Install it.
- Done/ then Reboot System Now.


