Download twrp 3.3.0 Root Vivo Nex/ Vivo Nex A:
unofficial build of twrp 3.3.0 have Now been available for the Vivo Nex A, user Who own Vivo Nex A can Root it by following the below Instructions. to Install twrp Recovery on Vivo Nex A First You need to unlock it’s bootloader after that You can Root it by Flashing Magisk 21.4.zip.
Vivo Nex A Run on QCOM SD710 SoC along With Android 8.1 6GB of RAM and 128GB of Internal Storage. The device come with 6.5 Inch IPS display with the resolution of 1080 X 2316 Pixels.
Contact Me for safe Installation, No brick risk
Disclaimer:
- Rooting May Void Your Device Warranty
- Make a backup & Move it to Safe Place Like Pen drive or PC.
- Make Sure Your Phone at-least 50% charge to Prevent accidental shut down during the Rooting Process.
Download Files:
- Magisk 21.4
- Vbmeta.img
- No verity opt encrypt zip
- twrp 3.3.0 Vivo Nex A by LR Team
- Platform tools/adb Fastboot tools
Note: flash vbmeta to fix any bootloop issue.
How to Install twrp Recovery on Vivo Nex A:
1. Prepare the Phone:
- From Settings Enable developer options. for that Go to Setting>About phone>tap 5-6 times on Software version>done. Now Go back /additional settings/ developer options & USB debugging > Turn ON, OEM unlocking > Turn ON.
2. Prepare Your Computer & Setup Platform tool:
- Download & Install latest adb fastboot driver on your computer
- on your computer Download & extract platform tools. then download & extract recovery.img & vbmeta.img in platform tool folder
- Move No verity opt encrypt zip & Magisk 21.4 to Platform tools folder
3. connect to fastboot:
- switch off Phone, Now press power & volume down key, once you see fastboot Logo connect phone to computer by using usb cable
4. unlock bootloader:
- use unofficial unlock script available for Vivo Nex A, for More Information You can visit Vivo CN Forum bbs.vivo.com.cn
5. Flash twrp Recovery:
- Open command window on Platform tool Folder, for that go to platform tool folder, in the address bar type ‘cmd’ & hit enter
- Now Send below code
fastboot flash recovery recovery.img
6. Disable boot Verification/ Fix bootloop:
- for that send below code
fastboot flash vbmeta vbmeta.img
- then reboot to twrp recovery by sending below code:
fastboot boot recovery.img
How to Root Vivo Nex A:
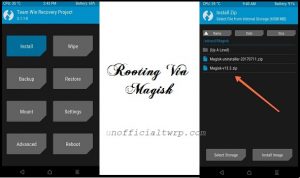
- In above steps we have boot our Phone in twrp recovery, Now Process to Next Steps
- on twrp go to backup tab and Make a nandroid backup
- wipe userdata
- Go advance option and enable adb sideload
- On computer open Command window in platform tool folder and send below code
adb sideload Magisk-v21.4.zip
adb sideload no-verity-opt-encrypt-6.1.zip
- once done Reboot system Now
if Sideload Not working
- Reboot phone, Download & Move Magisk 21.4 and No_verity_opt_encrypt.zip to device storage.
- Switch off Phone, Reboot Phone to twrp recovery by Pressing volume up and Power button
- Make a Nandroid backup
- wipe userdata
- Flash Magisk 21.4 and No_verity _opt_encrypt.ZIP via Install.
- Reboot System now


