Rooting is the Way to obtain SuperSU Right on Symphony Z12 in Simple taking full Control over the device. Rooting allow Some advance Functionality on a Rooted Phone. to Root Symphony Z12 First You need to unlock it’s bootloader after that You can Root it by using the Magisk.
Symphony Z12 Run on SC9863A SoC along with Android 9.0 2GB of RAM and 16GB of Storage. The device come with come with 5.9 Inch IPS Display With the Resolution of 720 X 1440 Pixels.
Advantage of Rooting on Symphony Z12:
- it Allow System access
- Rooting Allow System Modification
- Rooting allow Custom ROM Installation
- it allow Custom Recovery like twrp Installation
- Kernel tweaking & Custom Kernel Installation
disadvantage of Rooting the Symphony Z12:
- Your device warranty Now void
- New user May brick their Phone due to lack of Knowledge
Downloads:
How to Root Symphony Z12:
- we download Symphony Z12 Firmware (from web or Manufacture & unpack it)
- We Move boot.img File from Firmware Folder to Phone
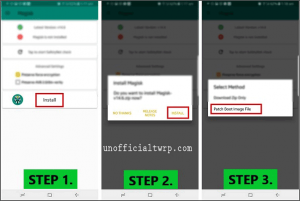
- Download & Install Magisk Manager on your Phone
- Run Magisk Manager & Click Update. Select patch img File
- Navigate the stock boot.img,

- Patched boot.img Placed in download Folder of Phone Storage
- Download & Setup Platform tools on PC
- Move Patched_boot.img File From Phone/Download/Folder to Platform tools Folder
- Now Install adb fastboot driver on PC
- Reboot Phone bootloader (Volume- + Power key) and connect it to PC by using the usb cable
- Open CMD in Platform tools Folder & send below code
unlock bootloader by sending below code:
fastboot flashing unlock
if any issue
fastboot oem unlock
confirm unlock by pressing volume up key
flash Root File by Sending below code:
fastboot flash boot 'Correct patched File name here'
fastboot reboot
Your Phone Now Rooted.


