Download twrp Recovery Root Digma Linx Alfa:
unofficial build of twrp recovery have Now been available for the Digma Linx Alfa, user Who own Digma Linx Alfa can Root it by following the below Instructions. to Install twrp Recovery on Digma Linx Alfa First You need to unlock it’s bootloader after that You can Root it by Flashing Magisk 21.4.zip.
Digma Linx Alfa Run on Mediatek MT6580 SoC along With Android 8.1 512MB of RAM and 4GB of Internal Storage. The device come with 4 Inch TN display with the resolution of 480 X 800 Pixels.
Contact Me for safe Installation, No brick risk
Disclaimer:
- Rooting May Void Your Device Warranty
- Make a backup & Move it to Safe Place Like Pen drive or PC.
- Make Sure Your Phone at-least 50% charge to Prevent accidental shut down during the Rooting Process.
Download Files:
- Magisk 21.4
- Vbmeta.img
- No verity opt encrypt zip
- twrp recovery Digma Linx Alfa
- Platform tools/adb Fastboot tools
Note: flash vbmeta to fix any bootloop issue.
How to Install twrp Recovery on Digma Linx Alfa:
1. Prepare the Phone:
- From Settings Enable developer options. for that Go to Setting>About phone>tap 5-6 times on Software version>done. Now Go back /additional settings/ developer options & USB debugging > Turn ON, OEM unlocking > Turn ON.
2. Prepare Your Computer & Setup Platform tool:
- Download & Install latest adb fastboot driver on your computer
- on your computer Download & extract platform tools. then download & extract recovery.img & vbmeta.img in platform tool folder
- Move No verity opt encrypt zip & Magisk 21.4 to Platform tools folder
3. connect to fastboot:
- switch off Phone, Now press power & volume down key, once you see fastboot logo connect phone to computer by using usb cable
4. unlock bootloader:
- Open Command Window in Platform tool folder and send below code
fastboot oem unlock
or
fastboot flashing unlock
- on phone confirm unlock warning by pressing volume up key
5. Flash twrp Recovery:
- Open command window on Platform tool Folder, for that go to platform tool folder, in the address bar type ‘cmd’ & hit enter
- Now Send below code
fastboot flash recovery recovery.img
6. Disable boot Verification- AVB/ Fix bootloop:
- for that send below code
fastboot format userdata
fastboot flash vbmeta vbmeta.img
- then reboot to twrp recovery by sending below code:
fastboot boot recovery.img
Install using SP Flash tool:
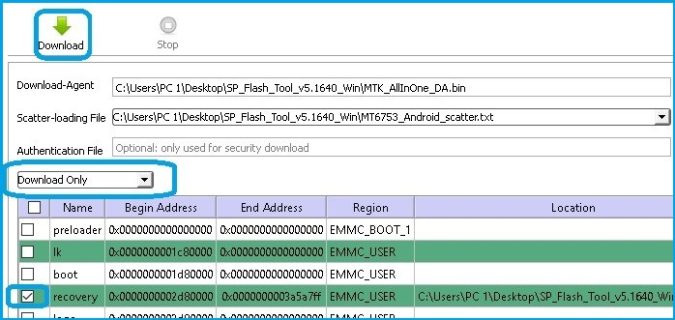
- Download and Extract SP Flash tools on PC
- Install Mediatek V-COM Driver on PC
- Download & Extract twrp image with scatter
- Run SP flash tools from Main screen select scatter File navigate scatter.txt file form the twrp folder and again same Navigate and Select DA File
- From the Partition list select Recovery Partition only. and then double click on it select twrp recovery.img File
- click download and connect your switched off Phone.

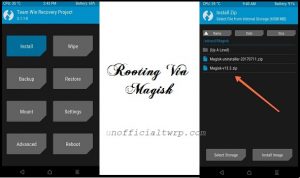
once done, don’t bootup Phone, directly go to recovery (by holding Volume+ & Power Key) & Flash magisk 20.3.zip & No verity opt encrypt.zip
How to Root Digma Linx Alfa:
- In above steps we have boot our Phone in twrp recovery, Now Process to Next Steps
- on twrp go to backup tab and Make a nandroid backup
- wipe userdata
- Go advance option and enable adb sideload
- On computer open command window in platform tool folder and send below code
adb sideload Magisk-v21.4.zip
adb sideload no-verity-opt-encrypt-6.1.zip
- once done Reboot system Now
if Sideload Not working
- Reboot phone, Download & Move Magisk 21.4 and No_verity_opt_encrypt.zip to device storage.
- Switch off Phone, Reboot Phone to twrp recovery by Pressing volume up and Power button
- Make a Nandroid backup
- wipe userdata
- Flash Magisk 21.4 and No_verity _opt_encrypt.ZIP via Install.
- Reboot System now


