Rooting is the way to obtain SuperSU Right on Galaxy A41 in simple taking full control over the device. Rooting allow some advance functionality on a Rooted Phone like custom ROM & custom kernel Installation, system tweaking etc. to Root Galaxy A41 First You need to unlock it’s bootloader after that You can Root it by using the Magisk.
Galaxy A41 Run on Mediatek helio P65 SoC along with Android 10 4GB of RAM and 64GB of storage. The device come with come with 6.1 Inch AMOLED display with the resolution of 1080 X 2400 Pixels.
Advantage of Rooting on Galaxy A41:
- it allow system access
- Rooting Allow system Modification
- Rooting allow custom ROM Installation
- it allow Custom Recovery like twrp Installation
- Kernel tweaking & Custom Kernel Installation
disadvantage of Rooting the Galaxy A41:
- Your device warranty Now void
- New user May brick their Phone due to lack of Knowledge
Download Links:
How to unlock bootloader on Galaxy A41:
- Enable usb debugging and oem unlocking in developer options → OEM unlocking
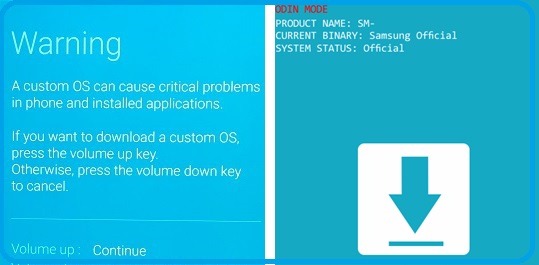
- Power off Your device. Press Volume UP + Volume down and Plug in Your device to a PC to boot into download Mode
- Long press volume up to unlock the bootloader. This Will Wipe your data and automatically Reboot.
- Your Phone Now unlocked but VaultKeeper service Not yet allow custom Partition flashing. Let’s Fix it.
- complete Initial Setup, Enable internet connection when Installing Magisk.
- Enable developer options, and Confirm that the OEM unlocking option exists and Grayed out! The VaultKeeper Service will unleash the bootloader after it confirms that the user has the OEM unlocking option Enabled. This step is to simply make sure the service gets the correct info, and also double check that our device is in a correct state
- Your bootloader Now accepts unofficial Images in Download Mode.
How to Root Galaxy A41:
- on computer Download correct Firmware For Your Device (from sammobile)
- Now unpack it, Rename AP_205xxxxxxxx.md5 to AP_205xxxxxxx.rar and extract it.
- Move boot.img.Iz4 to Phone and Patch it using the Magisk Manager
- Move Magisk_Patched.img from Phone/storage/Download to PC
- Rename Magisk_Patched.img to boot.img use 7Zip to and Compress it to boot.img.tar
- turn phone on download Mode (Hold Power and vol+ to enter recovery mode then go to download mode)

- connect Phone to computer.
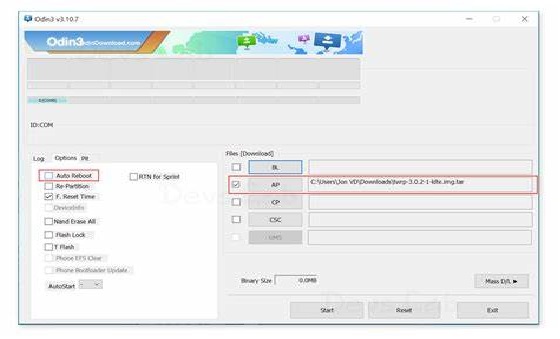
- Run Odin in PC & Locate boot.img.tar under AP Section. click start

- Restart Phone , Select bootloader
- Select Wipe data & Restart phone
- Install Magisk Manager. Your Phone Now Rooted.


